
Small-Room Layouts
Small Entryway Layout: A Welcoming Drop Zone That Stays Clear
Create a welcoming entrance with a slim bench, wall hooks and a key ledge, supported by a placement plan and practical checks for the door and walking route.
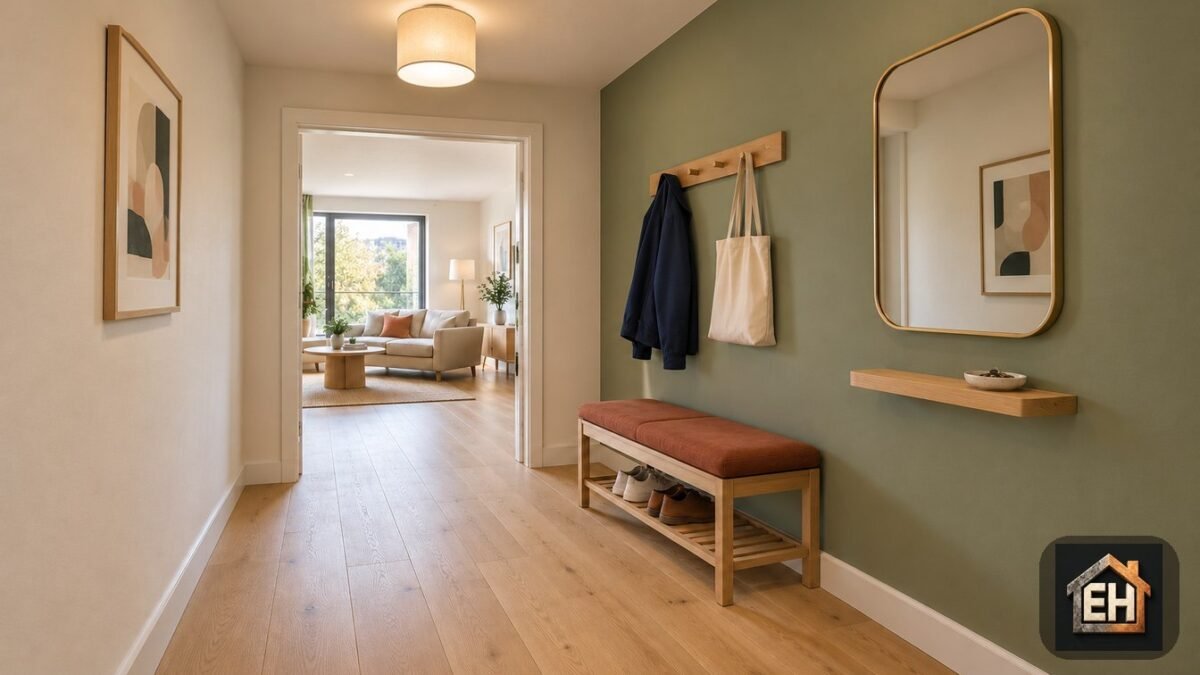
A useful small entryway layout gives shoes, coats and keys a place to land while leaving the door and the route into the home clear. Start with that route, then add the smallest set of furniture that supports your routine. In this example, a slim bench handles sitting and shoe storage; hooks and a shallow ledge use the wall instead of adding another floor-standing cabinet.
The aim is a welcoming entrance, not a miniature storage showroom. Sage paint, warm oak and a rust-coloured cushion give this compact space character without filling the walking area. The room photographs are AI-generated illustrations of an original, fictional concept, not a real home, an installation we tested or images of the manufacturer products linked below.
Start your small entryway layout with the door
Open the entrance door fully before deciding where a bench or shoe cabinet belongs. Notice the handle, the wall behind the door and the space you use while carrying shopping. Include any nearby cupboard doors and the route to the next room. An empty strip that looks generous in a photograph can disappear when somebody bends to remove a shoe.
Our proposed arrangement keeps the furniture on the right wall. The bench is farther into the entrance, while the key ledge and mirror sit closer to the door. The opposite wall holds artwork but no floor-standing furniture. This avoids creating an obstacle course with a console on one side and shoes on the other.
Use this arrangement when a compact seat is genuinely useful and its occupied space can be accommodated. If sitting there blocks the only route, omit the bench: a few suitable wall hooks and a shallow landing surface may be enough. Keep bulkier coats and spare shoes elsewhere rather than making every possession live at the entrance.
A placement plan for a 4.32 m² entrance
Proposed concept measurements—not a measured or tested home. This example uses a room 180 cm wide and 240 cm long. The dimensions were defined for the plan, not inferred from the generated photographs. The illustrations communicate the design; the drawing and table specify the hypothetical sizes.
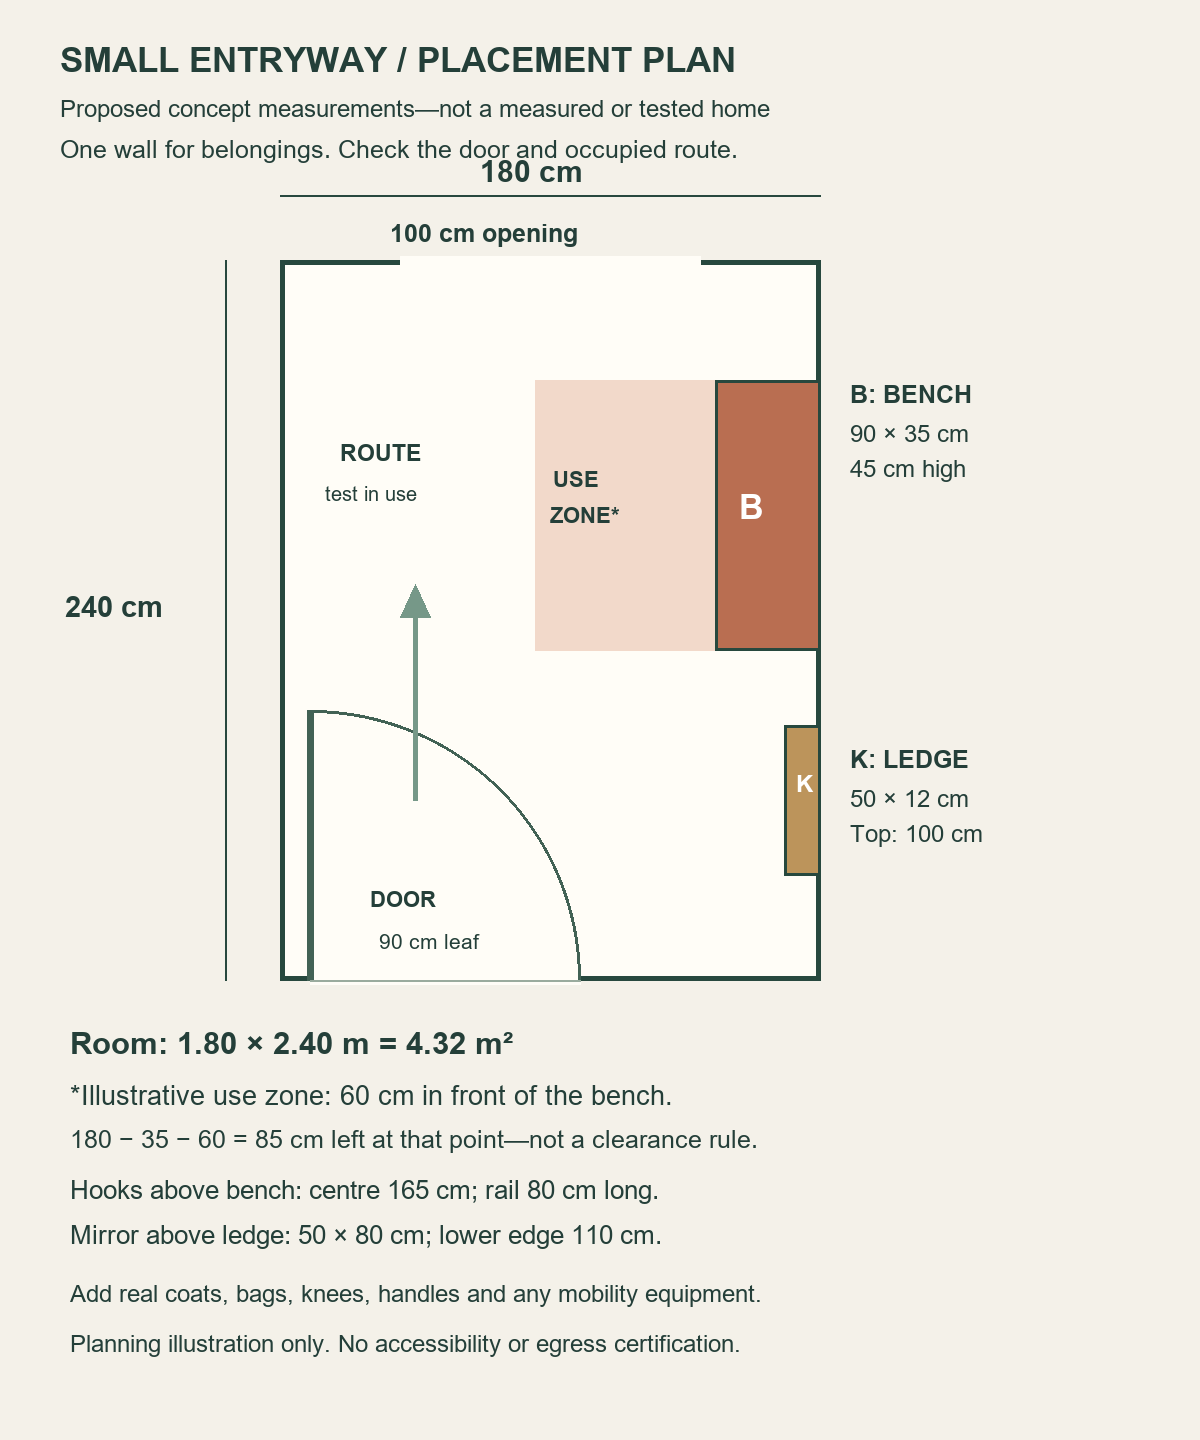
| Element | Size or position |
|---|---|
| Room | 180 wide × 240 long; 4.32 m²; ceiling 250 high |
| Bench | 90 long × 35 deep × 45 high, including the cushion |
| Key ledge | 50 long × 12 deep × 5 high; top 100 above the floor |
| Mirror | 50 wide × 80 high; lower edge 110 above the floor; wall-mounted independently |
| Hook rail | 80 long × 8 projection; centre 165 above the floor |
| Entrance and onward opening | 90 door leaf at entrance; 100-wide opening toward the next room |
| Empty space beside bench | 145 across the room before people, bags or projecting clothing |
The static calculation is simple: 180 cm room width minus 35 cm bench depth leaves 145 cm. It is not a recommended passage width or proof of accessibility. The diagram also shows an illustrative 60 cm use zone in front of the bench. If a seated person and their belongings occupy that depth, only 85 cm remains at that point. A different person or task may need more.
The entrance arc represents a proposed 90 cm door leaf; it does not account for every handle, hinge or fitting. Trace your actual door’s movement and check the opening while carrying the items you normally bring home. Do not move doors, alter an escape route or treat this drawing as a construction or compliance plan.
Check the entrance with shoes, coats and a person
Keep the seat available
A bench loses its purpose when bags permanently occupy the cushion. In the concept, two everyday pairs of shoes sit on the open shelf underneath, while the seat remains clear. That is a styling example, not a capacity rating: your shoe length, shelf depth and the bench’s internal supports determine what fits. Do not assume tall boots can use the same space.
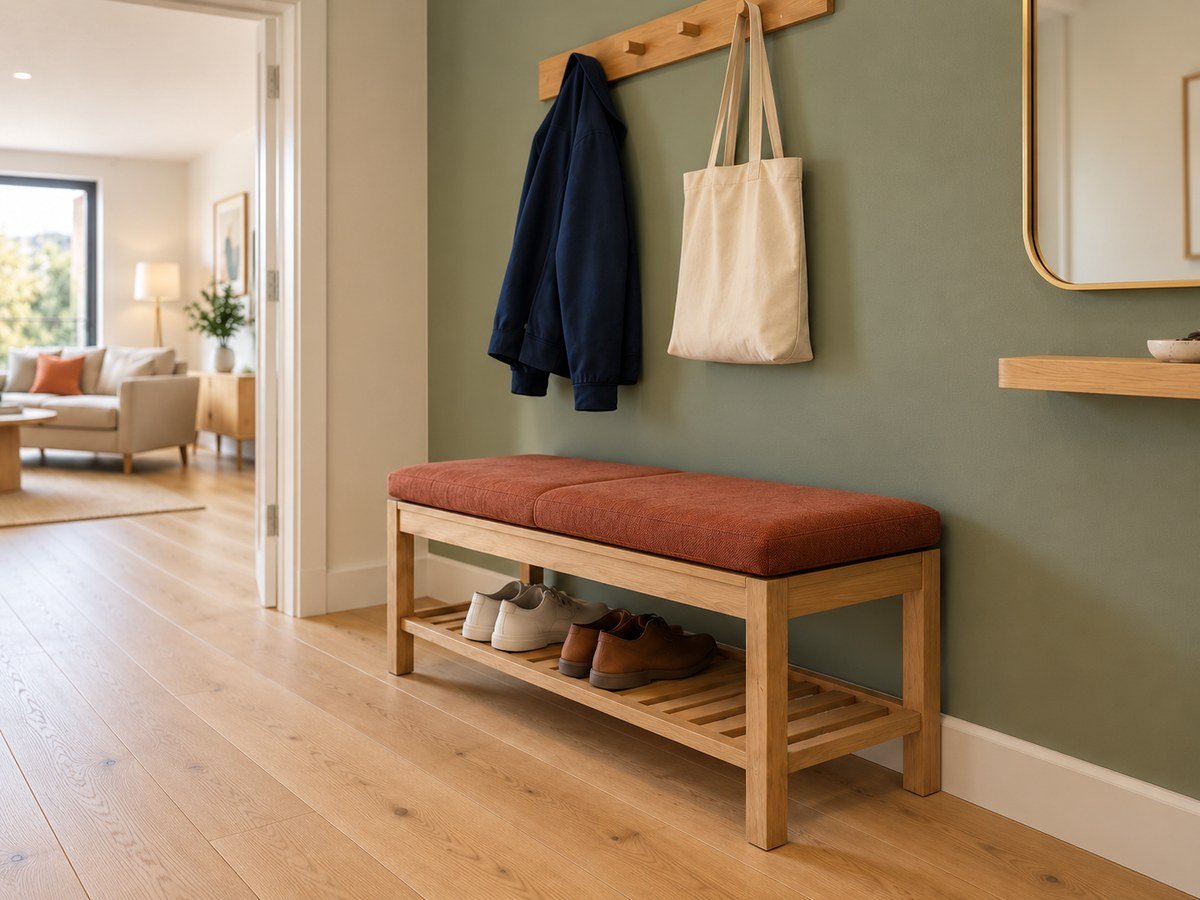
Try the sequence using furniture you already own or a safely marked footprint: come in, close the door, put keys down, remove shoes, hang a jacket and continue into the room. Then try it with another person passing. If the second person must repeatedly step over shoes or wait behind the door, remove something from the layout rather than adding another organiser.
Allow for what hangs from a hook
A hook’s projection is not the same as the space occupied by a winter coat or a full tote. Hang your usual items where you propose placing the rail and check their width and lowest point. Keep them clear of the seat, switches and doorway. Set hook heights for the people who will actually use them; the 165 cm height in this concept is not a universal reach recommendation.
For a rented home, obtain any required permission before fixing shelves, mirrors or hooks. Follow each product’s instructions and use fixings appropriate to the wall and intended load. An adhesive hook is not an automatic substitute for a screwed fitting, and a decorative shelf is not a handhold.
Make the entrance feel designed, not crowded
Choose one feature surface rather than several competing small accents. Here, the sage wall connects the bench, rail, mirror and key ledge. Warm oak repeats in those pieces and the floor; the rust cushion adds a warmer focal point. The cream opposite wall gives the eye somewhere quiet to rest.
The mirror provides a useful last check before leaving and reflects the room opposite. Position it for the actual view and sightline rather than assuming any large mirror makes a hallway work better. In this concept it is mounted separately above the ledge, not balanced on it. Check the frame’s projection and fixing requirements as carefully as the shelf.
Keep the key surface deliberately small: one shallow dish can be enough. Put mail into a separate household sorting routine instead of letting it spread across the ledge and seat. One framed print supplies personality without a gallery of projecting frames along a tight route.
Lighting should help you find keys and see the floor, not only make the entrance atmospheric. The illustration combines light from the adjoining room with a simple ceiling fitting. Select suitable lighting for your own ceiling and installation. We have left the entrance floor bare rather than putting a loose mat in the door’s path; any mat you add needs its own door-clearance and slip checks.
Compare dimensions before buying the look
These are manufacturer-verified size references, not the furniture pictured and not products we have tested. UK specifications were checked on October 14, 2026. Prices, local availability and delivery are not assessed.
- IKEA TJUSIG bench with shoe storage: 108 cm wide, 34 cm deep and 50 cm high. It is 18 cm longer and 5 cm taller than the proposed bench. The shallow footprint is worth comparing, but it is not a drop-in match for the plan. Redraw both ends and check seating comfort, the wall rail and the route.
- IKEA MOSSLANDA picture ledge: 55 cm long and 12 cm deep. It is 5 cm longer than the concept ledge, and its lip and groove make its usable surface different. IKEA specifies suitable wall fixings and a maximum picture height of 45 cm. Do not stand the concept’s 80 cm mirror on this ledge; mount a suitable mirror independently according to its own instructions.
Choose the routine first, then the product. A bench with useful open shoe storage may be easier here than a chest whose lid needs clearing. If you are considering lidded furniture for another room, our storage-ottoman fit guide explains the additional opening and usable-interior checks.
A short measurement checklist for your own entrance
- Draw the room: width, length, door leaf and handle movement, other openings, skirting, switches and radiators.
- Mark the occupied depth: furniture plus knees, feet, bags and hanging clothing—not just the catalogue footprint.
- Check access: opening the door, sitting, standing, reaching hooks and passing through with your usual equipment.
- Check installation: wall suitability, product fixings and load instructions, lease permission where relevant.
- Choose what leaves: spare shoes, bulky coats and paper piles need another home if the entrance cannot hold them without obstruction.
A successful entryway is pleasant to arrive in and easy to move through. Let colour, texture and a few useful pieces create the welcome; leave the floor route to do its job.
Original ExstarHub planning concept. AI-generated room illustrations; proposed dimensions are not measurements of a built home, accessibility certification or tested construction instructions. Manufacturer references checked October 14, 2026. No affiliate links.
Source: IKEA